John Morris Photography | Las Vegas Event Photographer
  • Home
  • Portfolio
    • Corporate Event
    • Trade Show
    • Commercial
    • Corporate Portraits
    • Editorial
    • Art & Travel
  • Blog
  • About Us
  • Contact Us

Blog - Page 2

Musings of an Event Photographer

John Morris Photography | Las Vegas Event Photographer > Blog

Las Vegas Corporate Photographer: Celebrities

Meet & Greet with conference attendee and General Colin Powell

Table of Contents

  • Working with Celebrities as a Las Vegas Corporate Photographer
  • A Las Vegas Corporate Photographer Be On-Time, Better Yet, Be Early
  • As a Las Vegas Corporate Photographer. Be flexible When Working with Celebrities
  • Ultimately, You Are in Charge. Control the Shoot
  • Grip & Grins. The Meat & Potatoes of a Las Vegas Corporate Photographer
  • Meet and Greets
  • Photo Shoots
  • Final Thoughts

Working with Celebrities as a Las Vegas Corporate Photographer

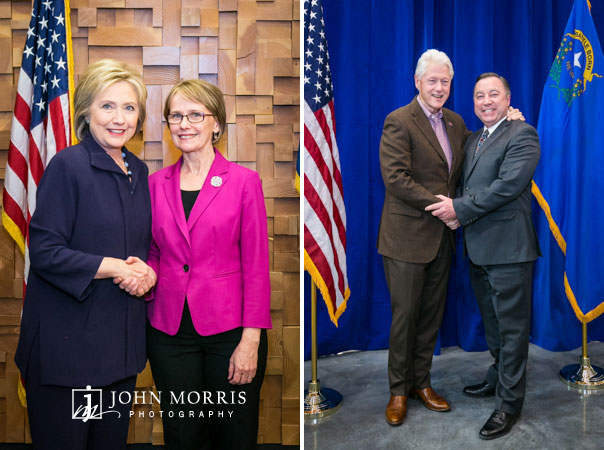
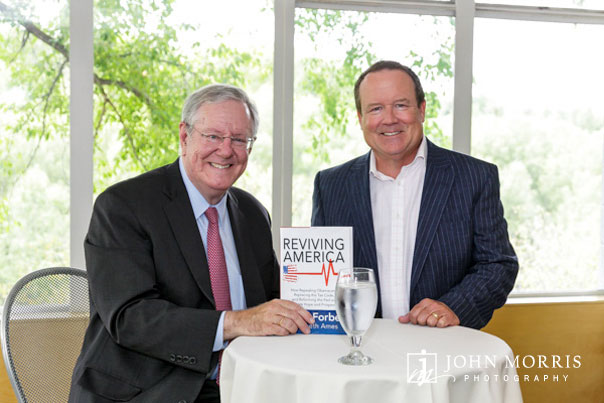
One of the many unexpected perks of working as a Las Vegas corporate photographer in San Diego and Las Vegas is the many celebrities I meet and get to work with. In my experiences, celebrities might be movie stars, entertainers, athletes, authors, and even CEOs. Honestly, what they are famous for matters little. My goal is to treat every celebrity I work with the same amount of respect and professionalism I would treat any of my clients. Important to celebrities is to respect the demands on their time and be flexible to their needs. While many rules of photography are specific and concrete, learning to be professional and deal with celebrities is not a skill that comes with clear instructions. What makes the best event photographers successful is not just the skill of the craft, but how they deal with the people they are photographing and working with. Event photographers are in the people business after all, and celebrities are people. So here are my thoughts on working with celebrities and some tips I have picked up along the way.

Peyton Manning speaking and posing with attendees at a corporate event in Aspen, CO.

A Las Vegas Corporate Photographer Be On-Time, Better Yet, Be Early

Being on time means being early enough to make sure you have plenty of time to set up and prepare. In my experience, there are always obstacles to setting up despite how well you may know the venue or how sure you are that you have everything you need. Being early enough to set up depends on how much work you need to do to prepare. Just make sure to give yourself extra time.

Celebrities are rarely on time, but never count on that. I honestly can’t remember a time when a celebrity or politician has been on time. This is not an indictment of the person, but more about the busy schedules they keep. Celebrities are constantly delayed, so be efficient, don’t waste their time, set up early and plan for things to go wrong.

The better prepared you are as a Las Vegas corporate photographer, the happier your client, and your guests will be.

Comedian Jay Leno hugging a couple during a meet & greet in front of a gold backdrop.

As a Las Vegas Corporate Photographer. Be flexible When Working with Celebrities

You have probably already noticed, but there are two factors that I keep talking about, flexibility and timeliness. They work hand in hand to help you manage the time you are with the celebrity. Efficiency is a combination of these two elements. Greet them and get started. I like to introduce myself and go right into explaining the setup up, what they can expect and where we plan on starting. But while I like to get started as quickly as possible, you must analyze the situation and be respectful. Don’t interrupt, be overbearing or inappropriate. Timing is everything. Celebrities may want to chat or take a moment to catch their breath and gather themselves. Others may want to get right to it, so be prepared for both.

As a Las Vegas corporate photographer, Flexibility is important. One celebrity I worked with had her own ideas about my lighting setup. After spending several hours setting up and perfecting my lighting, she arrived, introduced herself and promptly rearranged my main light to a position she preferred. I’ll be honest, it irked me, but she wasn’t rude about it and in the end, the change did not make much of a difference either way. She left happy with the shoot and her experience and the clients who hired me were thankful that I remained flexible and professional. I earned that client’s trust and was hired for many more photoshoots after that.

Senator Hillary Clinton and husband, President Bill Clinton posing and shaking hands with constituents.

Ultimately, You Are in Charge. Control the Shoot

Celebrities are inundated with attention, good and bad, so be understanding of that. Some are nice, some are not. Celebrities can be diva’s, and photographers want to be diva’s, but as a professional event photographer, you don’t get to be a diva if you want to keep your clients happy. Keeping celebrities happy will keep your clients happy. Some will take charge, others will expect you too. Listen to them, they have been through this many times before. Having said that, you are in charge. You need to use professionalism and tact to manage the shoot to the best of your ability. The kind of shoot will dictate what you can and can’t do to keep things rolling as efficiently as possible.

Greet them and get started. In my fifteen years of experience, I have never met a celebrity who arrived at a shoot and wanted to have a lengthy discussion with me about anything. What I have been asked after a smile and a handshake is “where do you want me” or “give me a few minutes to get ready”. My response to the first one is to show them their spot and to quickly explain the process in as few words as possible. The approach to the second statement is to wait until they are ready and then show them to their spot and quickly explain the process in as few words as possible. Get it?

Rick Harrison, signs a book and poses with an attendee during a corporate event.

Grip & Grins. The Meat & Potatoes of a Las Vegas Corporate Photographer

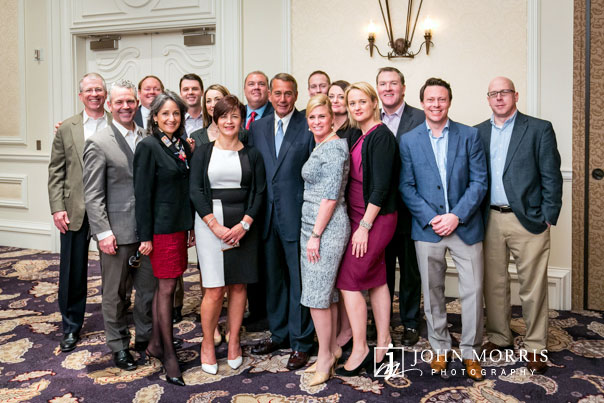
A grip and grin, as I define it, is a photo line where the celebrity will stand in a specific spot and one at time, shake hands and take a photo with attendees, or VIP’s designated by your client. These can be large or small groups and generally last anywhere from 10 minutes to at most an hour. One of the biggest challenges to you and your celebrity’s time are those people who want to talk too much. People get excited, some are star-struck, but most are respectful and move on quickly, but some will monopolize as much time as they can and seem oblivious to everything and everyone around them.  I control this situation by remaining polite and using verbal cues such as “next” and “thank you” as a way to indicate we are done and to move the guest along. You can also corral an event coordinator to help you move people along. Keep in mind that how you keep the line moving depends on the attitude of the celebrity and his or her patience and temperament.

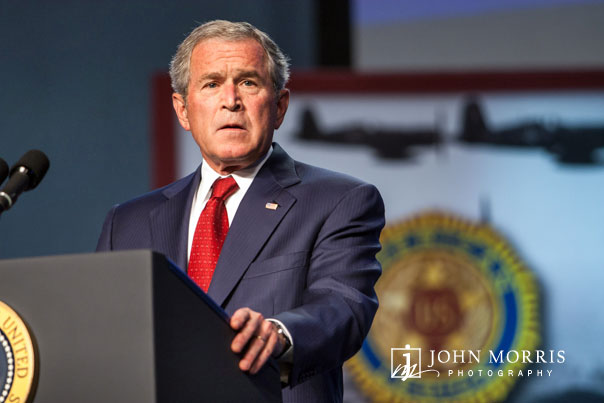
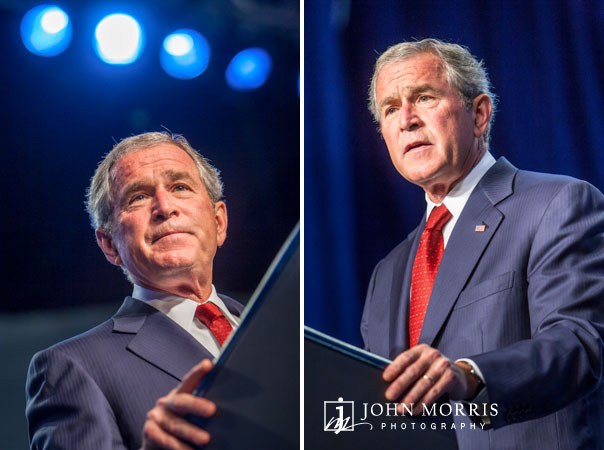
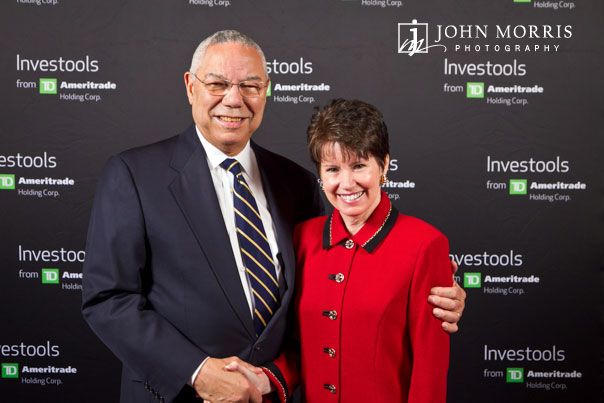
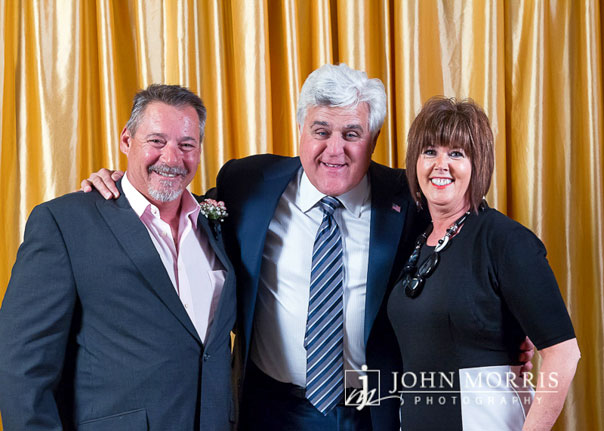
As an example, I have worked several times with a General and Secretary of State who is a pro at the grip and grin. All I have to do is tell him where to stand and then be ready to take the photos. He pulls the guest in, tells them to smile, and sends them on their way with a firmness and warm smile that leaves everyone feeling good every time. I have also worked with a late-night talk show host who is warm, he hugs, jokes, and talks with his fans so long that we end up going way over every time. But his enthusiasm and kindness are infectious and fun. I have also worked with a first-ballot Hall of Fame quarterback who was nice, but awkward and I had to keep people moving along because he seemed uncomfortable doing so. The lesson here is to respect the celebrity and be flexible about how they want to handle it. Use your observations to your advantage to help keep control of the shoot. Again, the most important thing you can do is be prepared, have a backup plan for equipment failures and be flexible and professional while respecting the celebrity and your client’s wishes.

Speaker of the House, John Boehner poses with a group of executives during a conference in San Diego.

Meet and Greets

The best way to describe a meet and greet is selected VIP’s will be in a room designated by your event planner or client. The celebrity will arrive and mingle with the guests for an allotted amount of time. Generally 30-45 minutes. These can be simple affairs or larger cocktail style receptions. You do not have a lot of control over this kind of celebrity event. During a meet and greet, I like to shadow the celebrity and be responsive to photo opportunities while not being intrusive. I am respectful and get the shots without being pushy or obnoxious. I don’t overshoot, and I try to find a balance of being available but not overly aggressive. I anticipate and place myself at angles and in positions so that I can get the best shots quickly. It’s important to be vigilant and observant and take clues from the celebrity so as not to annoy them while still getting the job done.

It is important to mention the privacy of the celebrity here as well.  Be conscious of circumstances while you shoot and avoid taking shots if the celebrity seems uncomfortable or is in a compromising position. This doesn’t have to be anything bad or obvious. Simple considerations such as don’t shoot if they are eating or otherwise not on guard. They may wave you off or frown at the presence of the camera. Be aware and respectful during these times and give the celebrity some space. As a professional event photographer, you are not paparazzi. Your job is to photograph the celebrity at their best, and in a professional and dignified manner.
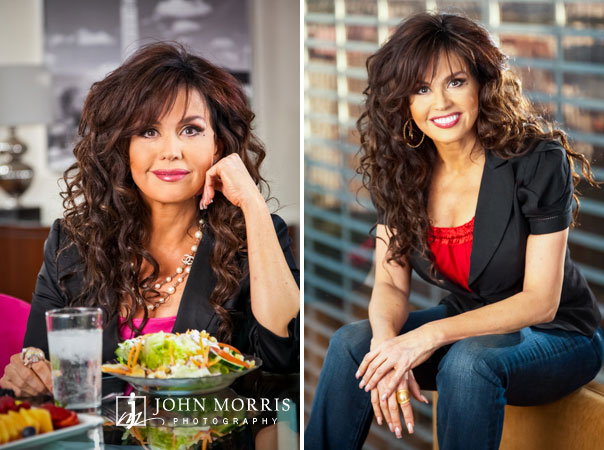
Marie Osmond posing for the camera during a lifestyle, commercial photo shoot for promoting healthy eating.

Photo Shoots

Everything we have discussed applies here with the main difference being that you are in the spotlight here. I won’t go into much detail but suffice to say that these can be the most stressful and most rewarding shoots. I will share my thoughts on photo shoots in a future post.

Steve Forbes and Executive smiling and posing for the camera during a book signing event.

Final Thoughts

You will seldom be hired by the celebrity themselves. You will be hired by event planners or coordinators and therefore will be a representative of the event company that hires you as well as the company sponsoring the event. As an illustration, Major Events Inc. is an event company that is planning and organizing a sales convention for their client, Big Corporation United. They have booked superstar athlete Johnny Colorado to be present for photos during a meet and greet with Big Corporations 50 top salesman. You are representing your self, Major Events and  Big Corporation and everyone wants the shoot to go perfect. With a celebrity involved, the spotlight will be on you and you are ultimately responsible for the success of the shoot, regardless of any other factor so be prepared, be flexible and most importantly, be professional. For a look at some of my celebrity work click here http://www.johnmorrisevents.com/portfolio/editorial/

October 18, 2017
Uncategorized
0 comments
by John Morris

10 Tools A Vegas Event Photographer Should Have in Their Bag

Weezer on stage with enthusiastic crowd at a corporate event

Table of Contents

  • 10 Tools A Vegas Event Photographer Should Have in Their Bag
  • Flash Bracket
  • Tungsten and Fluorescent Gels
  • Two Remote Flash Triggers and a Commander
  • Step Ladder
  • Circular Polarizer
  • USB Flash Drive
  • SD-CF Card Reader
  • Portable Light Stands With Umbrellas. A Vegas Event Photographer life(light) saver.
  • Monopod & Tripod
  • Laptop
  • Comfortable Shoes. A Must Have for a Vegas Event Photographer.

10 Tools A Vegas Event Photographer Should Have in Their Bag

As a Vegas event photographer, there are must-have items that I always carry with me when I am hired to photograph corporate events of any size.  While I always have these items with me, this is by no means an all-inclusive list. And while some of the items might seem obvious, I am always surprised that many Vegas event photographers don’t include these items on their checklists.

Checklist? Maybe I should have included a “checklist” on my top ten items list. As a Vegas event photographer, I find checklists invaluable to not only make sure I haven’t forgotten anything, (hey, it happens) but also to help ease my anxiety as I prepare for an event. Another trick I have learned is to keep my camera bag organized in such a way that every item has an assigned place. That way, if there are any empty spaces anywhere in the bag, I know I have forgotten something. This also helps at the end of the day to remind me if I have left something behind.

Okay, so here we go and in no particular order of importance……,

Flash Bracket

After many years and much money spent, I have finally found a flash bracket that I am happy with. I have settled on a Custom Brackets RF Pro. It’s lightweight and separates the flash from the camera. More importantly, this rotating bracket gives me both horizontal and vertical flash positions. I bounce flash a lot and this helps me keep the shadows to a minimum as well as letting me adjust the flash into a plethora of angles and directions. It works both with the camera in portrait or landscape mode. As a plus, I can also set the camera and flash down and it stays upright and easy to grab.

Tungsten and Fluorescent Gels

Without delving too deep into color temperature how’s and whys, different light sources emit light in different colors (temperatures). Here is a great article giving a thorough explanation. Relatively speaking, Daylight is blue, tungsten or incandescent light is orange, and fluorescent is green. Flash is similar to daylight. When the light sources falling on your subject are the same, everything is fine, but if multiple light sources are hitting your subject you can get ugly and distracting colors, particularly in skin tones. This mixing of lights can be hard to correct for, even in Photoshop. This is a common problem when using flash in tungsten or fluorescent-lit rooms. To make my life much easier in post, I will gel my flash to match the dominant light source in the room. I carry two different colors of gels. For tungsten, an orange gel or 1/2 to 1/4 CTO and a fluorescent (green) gel for fluorescent-lit room. You can purchase 12 by 12 gel sheets at camera stores or light shops and just measure and cut to create strips. I then just Velcro over the front of my on-camera flash. In a pinch, I have also taped or rubber-banded the gel in place.

Three trade show attendees posing for the photographer in separate exhibit booths during conference.Two Remote Flash Triggers and a Commander

My triggers of choice are Pocket Wizards, though I have heard that less expensive brands are also available and just as reliable.  Having radio transmitters used to be critical before I upgraded to Speedlites with wireless communication and control, but I still find them valuable in certain situations. One of my favorite tricks is to place a second camera with a wide-angle, mounted on a tripod, close to the stage and armed with a Pocket Wizard. I carry a second trigger in my pocket and use this to fire remotely for some great close up stage shots without me having to be stage side. I can then focus on other shots from different locations throughout the venue.

Step Ladder

I know a Vegas event photographer who carries one of these where ever she goes. I used to think it was too much, but every time we worked together, I would end up borrowing it. I finally caved and started bringing one myself and while I don’t always use it when I need it, I need it. Getting elevated can help crowded room shots and gives a slightly different perspective. It also works great as a workbench or a makeshift place to rest your feet if you find you have a few seconds. It’s easy enough to leave this item in the trunk if you don’t think you will need it but I always have one available.

Four golfers seated under and tree and posing for the camera during a corporate golf outing.

Circular Polarizer

The one filter that Lightroom doesn’t emulate very well, as a Vegas event photographer, I use a polarizer for outdoor shots to add pop to colors, remove glare and reflections and capture beautiful blue skies and clouds when possible. More importantly, a polarizer can give me an added four stops which is helpful when you are using fill-flash in bright outdoor situations. Golf tournament group shots come to mind. Being able to slow the shutter down by 4 stops oftentimes gets my shutter speed into a safe, flash sync number that I need it to be for outdoor flash. Handy tool to have.

USB Flash Drive

Small, portable, I always carry a few of these for delivering images on the fly, transferring to others, slide show presentations, and well, you know what they are used for.

SD-CF Card Reader

Most laptops and computers have built-in SD card readers but only a few have CF card readers. Since I shoot dual cards, RAW files on my CF cards and jpegs on my SD, if for some reason I need to transfer files to a computer other than my own, let’s say to a marketing rep, then I have learned to have both options available.

San Diego Commercial and Editorial PhotographerPortable Light Stands With Umbrellas. A Vegas Event Photographer life(light) saver.

Depending on the situation, I may leave these in the trunk, but I always have them nearby just in case. Impromptu headshots, speaker shots, even magazine cover shots are possible if you have a ” light stand and umbrella kit” handy. My kit consists of 2 Manfrotto 6 foot stands similar to this one, and two 60″ Westcott Satin umbrellas with adaptors so that I can mount Speedlights. I store my kit in a Manfrotto light stand bag which neatly holds the stands and umbrellas and is small enough so that I can easily throw the whole thing over my shoulder.  This kit is also handy in situations where maybe a small stage or presentation is not lit. Five minutes setup and my images improve 100%.

Monopod & Tripod

These are must-haves. I use a monopod regularly for shooting keynotes and large rooms with my Mark IV and 70-200.  See my article here for details on this combo. I Use a tripod for low light levels, mounting a second camera as mentioned, and for shooting booths and large crowded rooms. Tripods open up a whole world of possibilities that are just not available hand-holding.

Laptop

Believe it or not, I didn’t always carry a laptop. But as digital has evolved, and with the popularity of social media, many times our clients just expect to have images available on the fly. While I currently shoot large RAW files and smaller jpegs that I can just download to them, sometimes I still need to adjust or resize and a laptop becomes a necessity. I have a small enough laptop that I fit in the front pocket of my camera bag and have it with me just in case.

Eager attendees stream into the exhibit hall at Mandalay Bay for the SIA Snowsports Trade Show in Las Vegas.

Comfortable Shoes. A Must Have for a Vegas Event Photographer.

One of the best investments you can make. However, this is not as easy as it seems. I can easily spend 12 hours on my feet for large events and have walked upwards of 12-15 miles a day photographing major conventions. Comfortable shoes that also look good and are outfit appropriate depending on the setting clients you are working in should not be overlooked.  I’m a tennis shoe and hiking boot kind of guy and while both qualify as comfortable, they are not always appropriate. Over the years, finding the perfect shoes for every event has been an ongoing mission. When I have found shoes that I like, I will oftentimes purchase 2 or three pairs to be able to switch out during the day and to make sure I have an extra pair should they discontinue the line. It can be rejuvenating to switch to clean socks and fresh shoes in the middle of a long day or right after a long day is about to become a late night. Comfortable shoes, a must-have.

Well, there you have it. A small list of top items that I always carry with me when photographing an event of any size in Las Vegas or San Diego. I am sure you can think of at least 20 more items to add to this list and I welcome your suggestions and thoughts.  Until next time……

October 5, 2017
Uncategorized
0 comments
by John Morris

Professional Tips for Exhibit Booth Photography

Large, elaborate exhibit booth for a top computer company inside a large exhibit hall in Las Vegas.

Table of Contents

  • Photographing Trade Show and Exhibit Booths the Professional Way
  • The Basics. Camera, Lens, Tripod
  • The Tripod. A Most Versatile Tool
  • High Dynamic Range in Exhibit Booth Photography
  • Simple but Effective Tips for Exhibit Booth Photography

Photographing Trade Show and Exhibit Booths the Professional Way

Exhibit Booth Photography can be a lucrative opportunity for an event photographer. It can also be deceptively difficult to do it right. Large or small, exhibit booths are a critical part of trade show and conventions and therefore, an important investment worth photographing. Exhibit booth companies spend a lot of time and research creating and designing booths that are not only functional, but also aesthetically pleasing and ergonomically designed. Business, big and small look to exhibit and trades shows and invest ever-increasing amounts of time and money using these booths to attract and educate their new and potential customers and clients. The importance of excellent professional booth photography and photographers can’t be overstated.

Exhibit booth photography can be deceptively complicated. What do I mean by that? Camera and Photoshop, What else is there right? Well, the truth is that though you might be able to get by with that, to truly separate your work from the average, and keep your clients coming back, there is a lot more you should be doing.

The Basics. Camera, Lens, Tripod

Let’s start with the basics. Camera, tripod, and lens. What kind of camera should you be using? My choice, a digital 35mm Slr and here is why. It’s not about the sensor, quality or speed, but in the flexibility. Raw files, aperture control, HDR, color temperature, lens type, cable release, tripod mount, on-camera flash, and a bubble level. These are all important features you may or may not need when shooting booths. With a digital SLR, you have these options. It’s also about accessories and adaptability. Bubble levels, polarizing filters, tripod mounts, and a cable release, are all important accessories I consider must-haves for booth photography.

Lens choice is the second basic. Wide, super wide, telephoto or even a tilt and shift, having the flexibility of varying focal lengths is critical to taking booth photography to a level your competition isn’t. The space you have to work in, the size of the booth, and obstacles around the booth are all factors you can adapt to and mitigate when you have the proper arsenal of lenses. Much of photography is about problem-solving. Having options allows you to solve those problems easily and professionally.

Canon 5D Mark lll with 17-40, bubble level and cable release mounted on a tripod for Exhibit Booth Photography

The Tripod. A Most Versatile Tool

Having a tripod and a camera you can easily mount is critical to professional exhibit booth photography. From low light to HDR and exposure bracketing, to depth of field and focus considerations, a sturdy, adaptable tripod gives you incredible flexibility and is an outstanding problem-solving tool.  I always shoot booths and architecture in manual mode. This includes manual focus. I also use a cable release to avoid any kind of camera shake. You can use the 2-second time shutter release option in a pinch, but with a cable release, I can fire when I need to letting me time my shots during playbacks on monitors and screens or to avoid people walking into my shots. Here are just some of the benefits of having a tripod-mounted camera.

  • Low light, no problem. It allows for slower shutter speeds.
  • Lower ISO, better image quality.
  • Large of depth of field, small aperture, lots of focus and detail.
  • It allows me to use a polarizer on the lens to avoid glare and reflection.
  • Can shoot in HDR or multi exposures for stacking in post.

High Dynamic Range in Exhibit Booth Photography

HDR (High Dynamic Range) or stacking multi exposures in post, allows you to compensate for areas of highlights and shadows and increases the exposure range of your images. This creates images that capture much more details of a booth than a single exposure can. I remember in the days of film, if I wanted this kind of dynamic range, I would need to bring an arsenal of portable lighting to even things out. With an average exposure, spotlighted features, screens, and monitors are blown out. Exposing for the monitors and highlights leaves the rest of the image dark and underexposed.  This in turn creates unacceptable levels of noise in the shadows as you try to bring them up to proper levels in post. At best, you create a lot of extra work in post as you try to make things look their best. My advice is to learn to use your camera’s HDR functions. They do a pretty good job and with just a little tweaking in post, can give you very acceptable results. Just be careful not to overdo it. In my opinion, there is nothing worse than an overcooked HDR image. Keep it real.

Having your camera mounted on a tripod allows you to use a circular polarizer. As far as I know, there are no Lightroom or Photoshop actions that adequately replicate the magic effects of having a polarizer on the front for your lens. Why a polarizer? One work, Glare. You can eliminate glare and reflections on shiny surfaces restoring color and detail Polarizers are also great at darkening monitors and screens allowing you a certain amount of control over their brightness which in turn allows the exposure and range to even out throughout the image.

Bright red exhibit booth for a cycling trade show.

Simple but Effective Tips for Exhibit Booth Photography

Here are some simple, but important tips that will take your exhibit booth photography to the next level. Consider the space you will have to work in. This is important and will help you determine the kind of lens and what angles are best. In a perfect world, every booth would sit in a convention hall all by itself with ample space for you to walk around but in reality, they are usually crammed into 10×10 or 10×20 spaces, nudged up against each other and hidden behind giant support columns and room dividers.

Bubble levels. Leveling the camera prevents unwanted perspective distortion and makes the Lightroom lens correction tool more effective. Which leads us to another tip. Use Lightroom’s lens correction tool for perspective. Using this tool doesn’t replace a traditional tilt and shift completely but if you keep your camera level and square to your subject and give your self a little space around the edges of the frame with you shoot, it can be almost as effective and in most cases does a great job.

Approach your exhibit booth photography like you would an interior shoot. While working with a very successful interior architectural photographer, I picked up a few tricks that I apply to my booth photography. Walk the booth first. Do a complete 360 of your booth when possible looking for the most attractive features and angles. Look for background and foreground distractions and opportunities. Looking for annoying spotlights, impediments, distracting signage, and lighting helps you to avoid any unwanted and unnecessary elements in your photograph. I have found that shooting booths from side angles that include at least two sides of the booth looks best. Sometimes companies want straight on shots so make sure you get those, but the beauty shots are generally from angles.

Massive exhibit for Caterpillar construction vehicles inside an exhibit hall for a trade show in Las Vegas.

Clean the booth, remove trashcans, water bottles and any other distractions. Straighten literature racks and handouts. Organize and rearrange furniture and chairs, if necessary, to hide ugly and reveal booth highlights and features. Turn on any monitors or TV’s whenever possible. I push for this in my pre-shoot discussions and try to have a technician or company representative on hand to help me with this. Active screens and monitors can breathe life into a booth.

When the monitors or screens are on, be patient and try to capture something colorful and interesting on the screen.  Look for company logos to appear and be ready to shoot. Usually, the content will repeat itself every few minutes so if you miss it the first time, just wait a few minutes and time it right. Remember, this is another time when having a polarizer helps. By turning the polarizer, you can adjust the brightness level of screens.

Look through the lens while you turn to get the desired effect. Trust me, try it on your TV at home. You will see what I am talking about.

A final note. Make sure your color temperature is right. There are whole lectures dedicated to the importance of color in logos and branding for corporations. Coke red IS a thing. Shoot an area of white in your booths so that you can adjust the color balance in post. Shoot in raw so that color balance becomes an easy adjustment. I probably should have put this earlier in my post but maybe since it’s at the end you will remember. Color balance is important. Make sure you get it right.

Well, hopefully, this post gave you some ideas and tips for shooting professional exhibit booth images. If you have any questions, please feel free to respond to this post with any questions you may have. You can aso check out more of my Exhibit Booth Photography here at http://www.johnmorrisevents.com/portfolio/trade-show/

Till next time…….Modern design exhibit booth on display during a trade show in Las Vegas, NV.

September 28, 2017
Uncategorized
0 comments
by John Morris

In Las Vegas Event Photography, Gear Matters

An executive delivers a keynote speech to his audience and is dramatically spotlighted, on stage, from a single light source

Table of Contents

  • Las Vegas Event Photography Requires Pro Level Equipment
  • So What Camera is Good Enough for Las Vegas Event Photography?
  • Only Top Level Lenses
  • Gold is Better than Red, Right?
  • Flash IS Available Light

Las Vegas Event Photography Requires Pro Level Equipment

I’m just going to put this out there. Gear matters! For professional Las Vegas event photography, you want to be able to compete for the large clients, the multi day corporate events and star studded keynotes, gear matters. I get asked all the time about equipment. From other photographers, to event planners and even attendees. It usually starts with, “What kind of lens is that”? or “Is that the Mark 5?” While I am not a gear guy, I do love talking about photography, so I am always happy to share what I’m carrying and thoughts about why I am using it.

Some will say that in the hands of a skilled photographer, any camera is good enough. While true in a simplistic way, in reality, a professional photographer is going to use the best equipment possible in order to insure success. Obvious right? Well good equipment costs money and if you are just starting out, money can be in short supply. I understand that, but in order to be able to meet the needs of high end corporate event clients, you will need to invest in order to be successful. Sure, you may be able to land a big client, but without the right gear, your results will be disappointing and you may not keep them.

Fortunately, while I strongly advise professional quality camera equipment, you don’t need a lot of gear. I probably shoot 80-90% percent of all my assignments with a used Canon 5D Mark II, a 24-105 F4 and a Canon 600 Flash unit(an older 580 would be just as good). To Nikon users I apologize. I will be writing in Canon language. That is what I know, but you can apply these same principals to Nikon, you will just have to translate. For a point of reference there are basically three categories of Canon camera. This generally applies to Nikon as well.

A capacity crowd of attendees pack a convention hall to watch and participate in a mock Family Feud entertainment segment of a corporate event.

So What Camera is Good Enough for Las Vegas Event Photography?

EOS 1D Series. Top of the line and in my opinion not necessary for corporate event photography. Though I love my 1D Mark IV.

EOS 5D Mark II, Mark III, 7D, 7D Mark II, EOS 6D. Cameras in this group are what you should be aiming for. These are what I consider the workhorse category for most Las Vegas event photographers and wedding photographers. They may not be fast enough for sports work, but more than adequate for most other kinds of photography.

EOS 80D, 70D 60D, any Rebel. These are cameras that I would not consider using for consistent event work. They have good sensors but are not designed for casual photography. They don’t have the appropriate speed or durability needed for the rigors of professional Las Vegas event photography. They might work as inexpensive, emergency backup cameras in a pinch.

EOS 5DS, 5DS-R. These cameras are specialty and not necessary for everyday event work.

The camera doesn’t have to be a new one. Find a good used one. Your camera doesn’t have to be the latest model either. My 5d is several generations old now and I still don’t feel the need to upgrade at this point. You do have to invest in good equipment. You can work your way up with small jobs and lesser equipment but for the big stuff, you need pro level. With the camera body, the sensors are similar, it’s the focus speed, focus speed in low light, sync speed, and long term durability that matters .

Only Top Level Lenses

24-105 f4. Some might argue that the 24-70 2.8 is necessary and that having that one extra stop can make a difference, however, with an image stabilizer, and it’s excellent sharpness combined with the increased ISO sensitivity of camera sensors, in my opinion, negates the need and makes the 105 a better choice. Add the extra reach of the 105 and the fact that this it is a very sharp, and this lens stays permanently attached to my 5D. In fact, so much so that I have two. The second is a backup because I wouldn’t want to shoot an event without it. These lens are readily available used and for decent prices.

There are many shooters who like fixed focal lengths vs. zoom and I understand, but for me, a zoom is much faster than using my feet when an opportunity presents itself. A zoom also allows me to be discreet and low-key. Most importantly, from a cost standpoint, I can get much more focal length for my money. Good primes are expensive. Inexpensive primes, while better than inexpensive zooms, still aren’t quite good enough, in my experience. Yes, the standard 50 is a capable lens, and if that is all you have, use it. I would prefer to shoot with that than a sub $500 zoom lens, but even a good, inexpensive 50 can be slow to focus. There are always exceptions of course, but in my experience, not many.

Borrow a lens. There are plenty of camera rental companies now. If you do land a big job, rent. (Names of a few rental companies) You only get one chance to impress a client. No excuses! Keeping a client once you have them is a lot easier than finding new ones.

Hologram of BB King performing on stage during a Keynote for Microsoft Corporate Event

Gold is Better than Red, Right?

The quick answer, no. Red band vs. gold band. Canon has several categories of lens. Their L-series lens are generally black with a red band or ring. These lens generally are optically and construction wise superior and suitable for professional use. Gold band or ring lenses are non-L EF lenses that may or may not have USM motors for quicker focus. They are slower to focus, less durable and have more glass elements between your subject and the camera sensor. There really is no comparison for focus speed, durability and sharpness between the two.. I know I shouldn’t make absolute statements, there are always exceptions, but this is my professional opinion and I am going to stand by it. L series, red band/ring lens are what you should be using. I want to touch on the durability difference. I don’t need to be able to drop my gear from 10 feet in order to use it, but in corporate event photography, particularly multi day events, you gear gets used a lot! This constant use, and inadvertent bounces and bumps, quickly takes a toll on your equipment. You’re lenses are particularly vulnerable because they stick out there take the brunt of impacts both large and small. Red bands, L- series lenses are just built that much better and they can stand up to the abuse for alot longer.

Meet & Greet with conference attendee and General Colin Powell

Flash IS Available Light

You just can’t count on available light in Las Vegas event photography. I’ll qualify that. There is always available light during a corporate event, you just never know if there will be enough of it and what the quality will be! Flash is not an option, it is a necessity. Canon 580’s or 600’s are what you need. Smaller Canon on camera flash units or after market brands that don’t output at least a GN (guide number) of 36, will be of little if any use. Without getting into technical details, 580’s and their equivalents 580II, 600, and some aftermarket brands such as Metz 58 AF-2 and AF-2, Nissin Di866, and even the venerable Vivitar 285HV (if you can find one) are all suitable power and feature wise to get the job done. Personally, other than the Vivitar, I have always used Canon brand flash units, but on a budget, I would definitely use one of the aftermarket brands. I have also found that a swivel head is critical to being able to control the quality and direction of the light. Do not be hesitant to use older models such as the 580 or 580II. I currently use the 600’s but I still have 580’s that I use regularly and as backup.

For the level of Las Vegas event photography that is quite lucrative and exciting, camera style, lens build and flash output are critical to your success. Anything less, and you are making a challenging job, a heck of a lot harder. The good news is that professional level equipment will fill you with confidence and help create work that will make your clients happy. More good news! You don’t have to buy new or even the latest models. Over the last few years, improvements in camera technology, sensors and lens have slowed. In fact, I am currently using all version one lenses, a 1D Mark IV that they don’t event manufacture anymore and a wonderful 5D Mark III. I have recently upgraded to Speedlight 600’s for their wireless control but my 580’s are still quite relevant. There you have it, my take on equipment matters.  To see some examples of my work with the above equipment recommendations check out my portfolio here http://www.johnmorrisevents.com/portfolio/corporate-event/

August 31, 2017
Corporate Event Photography·Photography
0 comments
by John Morris

Equipment Tips for Photographing Las Vegas Corporate Events

President Bill Clinton address a crowd of supporters.

Table of Contents

  • Photographing Las Vegas Corporate Events. Long Lens and a Monopod
  • My Two Favorite Lens for Las Vegas Corporate Events Photography
  • Camera and Long Lens Combo
  • My Four Key Reasons for Using the Canon Mark IV and 70-200 on a Monopod
  • Misc Benefits of a Long Lens and Monopod
  • A Working Las Vegas Corporate Events Example
  • Wrapping it All Up

Photographing Las Vegas Corporate Events. Long Lens and a Monopod

When shooting Corporate Events either in San Diego or Las Vegas, the more advantages, tricks or equipment combos I can use to ensure quality photos, the better. Being able to capture professional-quality imagery for the client, particularly in difficult or low light conditions separates the average from the best. On top of that, you don’t get second chances to capture compelling images and important moments when working live events, stage performances or keynotes. In this post, I attempt to explain some of my thoughts on a camera, lens combo that I have come to rely heavily on to ensure I provide the best images possible to my event clients.

James Carville addressing a corporate event.

My Two Favorite Lens for Las Vegas Corporate Events Photography

Frankly, I only have two lenses that I use to handle almost 95% of all my event work. My workhorse Canon 24-105 f4 IS (I have two) and my Canon 70-200 2.8 IS (version 1). With a 24-105 on my 5D Mark lll and the 70-200 on my 1D Mark IV, I am very comfortable with pretty much any scenario or subject matter. Before the newer, higher ISO’s which are very usable at even 6400 in a pinch, the 24-105’s might have been a bit slow. I struggled with several 24-70 2.8’s and never found a “good one” that didn’t have back focus issues with some of the older digital cameras. But today, the 24-105’s are more than fast enough at f4 and ISO 3200 with a little Lightroom magic added to render virtually noiseless images. Add the 2-3 stop IS compensation and the only real problem I have is keeping the subject still enough in low light to avoid motion blur. I’m getting off track here, my use of 24-105’s is a whole different discussion.

Blue Man Group entertaining a corporate event audience

Camera and Long Lens Combo

So why the 70-200 2.8 and why is it almost permanently attached to my 1D Mark IV and monopod? The first answer is weight. This is a heavy setup. Many times I find myself shooting a general session or a keynote speaker and lugging around just the camera and lens without any support would wear me out. Award ceremonies and graduation, where I can be holding the camera in position for 30-45 minutes at a time, are just not comfortable, and let’s be honest, doable for me. I could carry a lighter setup, and many times I do, but as we discuss this combo further, you will see the advantages and begin to understand why I love this setup with the monopod.

Securing the 70-200 on the monopod using the tripod collar gives me a very balanced and steady shooting platform. Not only is this combo heavy, but zoomed out to 200mm presents the real risk of camera shake. The longer the focal length, the greater the exaggeration of any kind of movement or shake on your part. In event conditions, low light is always a potential concern so the monopod gives us a bunch of breathing room.  The rule of thumb for hand-holding focal lengths and the suggested usable shutter speed is the focal length X2 = the shutter speed.  So if we are zoomed out to 200, we need to have our shutter speed set to at least 1/500 of a second.  Generally, even on well-lit stages, we are lucky to get 1/125 so you can see there are lots of potential issues with getting in-focus shots in low light.  With the lens in place on top of the monopod, I easily get a very high percentage of in-focus shots, in fact, I rarely miss. On a side note, Canon recommends that you turn off the stabilizer on this lens when it is on a tripod or monopod. Something about the lack of instability can confuse the system that is expecting a certain amount of shake.  I do this, but honestly, I have forgotten many times and not had a problem. Just keep this in mind if your monopod mounted and are having issues with focus.

College Game Day set during a corporate event

My Four Key Reasons for Using the Canon Mark IV and 70-200 on a Monopod

Heavy, Steady, Low Light and Stealth. I feel like of covered heavy first, sort of combined steady and low light second and now onto stealth.  Generally speaking, I personally do not like walking up to the edge of the stage and getting in the way of 1000’s of people to get close-ups of the speaker. Of course, there are many times when this is necessary for a great wide-angle shot of the speaker in context, including the crowd, but being able to stay 4-5 rows back and still get in tight, is very helpful. From a position further back from the stage, you can avoid distracting the speaker, stay out of the way of production cameras (usually stationed towards the back) and avoid irritating VIP’s who are usually occupying the front rows.

Misc Benefits of a Long Lens and Monopod

My final argument for why I use this setup is an assorted mix of important benefits that are crucial in my attempts to capture keynotes and general sessions. I will list them here in no particular order:

  • Sometimes you physically can’t get close enough. This combo gives me the ability to pull the subject in when I can’t physically get closer.
  • Discussed above plus added “reach”.
  • Speaking of “reach,” that added length helps me if I am at the wrong end of the stage when something important happens and I need the shot.
  • If the stage is much higher than the seating area, you can move back to avoid shooting up your subject’s noses.
  • Natural expressions and candids (where the subject is not aware of your presence) are much easier when you can be away from the action.

Enthusiastic audience applauding during a corporate event

A Working Las Vegas Corporate Events Example

I have a story that helps illustrate some of these benefits from a shoot I did just a few weeks ago in Las Vegas. A major Japanese auto manufacturer was hosting a dealership meeting for several hundred of their biggest dealerships. They wanted me to capture various CEOs and VIPs as they welcomed and introduced the next year’s line of new cars. The cars themselves were top secret and they did not want images taken of the cars. On top of that, they did not want me to be upfront, preferring that I stay low key.  Apparently, the last photographer they hired was a major distraction and they did not want a repeat of that. Of course, this is a tailor-made situation for using my long lens, monopod setup. That’s why I’m sharing it with you. Using my setup, I was easily able to stay back and out of the way, isolate the speakers from the cars in the background, and because the presentation was fast-paced, I was able to “reach” across the stage to capture shots of important events when I was not in always in a prime shooting location relative to the on-stage event.

Excited Corporate event attendee in full racing gear

Wrapping it All Up

A couple of final and important details. This setup works best with the tripod collar attached to the 70-200. Not only because you need it to mount the lens on the monopod, but also because you can loosen the collar a bit and rotate the lens from Horizontal to Vertical quickly. A warning! This does tend to scratch up the body of the lens under the collar so be aware of that.  I buy my lenses for the long haul so this doesn’t bother me but I certainly understand if it might bother others. Second and third are Mark IV related. The Mark IV has separate shutter release buttons when either holding the camera in landscape or portrait mode which makes it very comfortable when operating this setup. I can hold the camera comfortably in either orientation which also helps stabilize my camera to avoid shake.  And finally, the 1.4 crop factor with the Mark IV’s sensor gives me just a bit more magnification allowing me to get “a bit closer” to my subject than a full-frame.

There you have it.  My go-to combo for shooting many aspects of corporate events. I have included a couple of links to help you in case you are interested in exploring this setup further. The Manfrotto monopod and the monopod head can be found on B&H and other equipment sites. Thank you for reading and we will talk again soon. Please take a look at some of my Las Vegas Corporate Events Photography here http://www.johnmorrisevents.com/portfolio/corporate-event/

Manfrotto Monopod

Manfrotto Rapid Connect Monopod Head

August 24, 2017
Corporate Event Photography·Photography
0 comments
by John Morris

Corporate Events: Scouting for A President’s Keynote

President George Bush speaks during a corporate event.

Table of Contents

  • My Scouting Approach for Corporate Events
    • Getting There. The Logistics of Transportation at Corporate events.
    • Scouting Corporate Events for Lighting
    • Scouting for Stage Lighting at Corporate Events.
    • Corporate Events Scouting. Envisioning The Shoot
    • Speaking with a Coordinator or Production Manager
    • Putting It All Together

My Scouting Approach for Corporate Events

I shoot corporate events. I also coach aspiring corporate events photographers. Currently located in San Diego, I spent most of my career as a corporate events photographer based out of Las Vegas. If you’re going to work as a corporate events photographer, Las Vegas is a good place to be. Something you will learn about me if you visit my blog often is that I am an anxious person. Preparing and scouting events not only helps alleviate my anxiety, it is also a requirement as a professional photographer. So, when asked if I would photograph then-President George W Bush, I got very excited. I also got very anxious. This is how I scouted and prepared for this particular event.

The President’s keynote was scheduled for 9 am in Reno, NV., in front of a crowd of 1000 American Legion members. Reno is about an 8-hour drive from Las Vegas. I was unfamiliar with the conference hall where the speech would be given so I was not certain of what kind of lighting or access I would have. Should I drive or fly? When should I arrive? The day before, or two days before so that I could scout? Will they let me scout? How close will I be allowed to get to the President while he speaks? What is the lighting like in the room? Can I use a flash? Should I use flash?  These are all important questions that you need to ask yourself when preparing for a shoot. You don’t get to hit the reset button when shooting keynotes so you must prepare as much as possible beforehand. Scouting is important.

Getting There. The Logistics of Transportation at Corporate events.

I decided to drive. Time-wise, 8 hours up and 8 hours back is a huge time investment, but I hate what flying has become. I always have to fight to protect my equipment and risk the airlines losing or damaging my gear. Expense wise, the cost of fuel vs. the cost of a round-trip ticket and a rental car was a wash. Additionally, I like to drive and I wanted to use the opportunity to explore Virginia City and Mono Lake for a personal project I had been working on. In order to have time to scout the venue where the President would be speaking, I decided to drive up a few days before. With a late morning start and an 8-hour drive I would arrive later that same afternoon, check in to the hotel and be ready to scout at 9 am, the day before the speech. This would allow me to scout the conference hall during the same time of day that the president would be speaking.

An important part of scouting any location is transportation. Commute time, parking, ease of access, and entry and exit points are all often overlooked aspects of an event’s location. Part of your job as a professional is to be on location and ready to shoot. Knowing how long it will take you to get there, where to park, and how you will get your gear from your vehicle to the event are critical considerations. Even the route you take from your car to the event site must be accounted for. Knowing the logistics ahead of time, helps you prepare for the unexpected and lets you concentrate on the job at hand. Ignore these details and you might find yourself hoping you find a parking spot close and feeling a lot of unnecessary anxiety as you scramble to arrive on time.

Scouting Corporate Events for Lighting

When scouting any location, even an indoor one, I try to scout at the same time of day as the event. I can’t count how many times a wayward skylight, entryway doors or windows have unexpectedly effected a shoot. I am also able to observe the quality, quantity, and color of the light.  This way, I can ensure that I am carrying adequate lighting equipment and gel any flashes I might need. Upon arriving at the convention hall I was able to determine that the hall was very big. The ceilings were probably pushing 50 feet making bounce flash ineffective. If I was going to use flash, it would have to be direct. There were entry doors with windows at the very back of the hall which would probably not affect the stage lighting in any way. The main light source for the entire hall was ceiling-mounted, mercury vapor lights. These types of lights emit a magenta if your camera’s white balance is set for daylight. I was able to make all these calculations within just a few seconds.  While they are important factors to consider, they were largely irrelevant in this case because of the elaborate stage lighting.

Bathed in blue light, President George Bush speaks confidently during a corporate event.

Scouting for Stage Lighting at Corporate Events.

If you’re at all experienced with large, indoor event photography, you would have probably already assumed two things. First, the conference hall would be large with high ceilings. Second, that the podium or stage, where the President would be speaking, would be lit well. Production companies tend to splurge when preparing for keynotes as important as a President’s. In this case, the stage was well lit with tungsten spots and floods.  The amount of light I would have to work with was not going to be a problem. It is also important to know the direction and where the lights were coming from. Knowing this, you can determine how the light will fall on your speaker and where the best vantage points will be. I was able to speak with a lighting technician and he briefly brought the stage lighting up to keynote levels. I then metered and recorded the settings a day ahead of the President’s speech. Now I knew that I could handhold, use a low ISO and I wouldn’t need flash.

Not all stage lighting is created equal. When scouting for stage lighting, make sure to identify any hot spots or areas on stage where the light falls off. Hot spots usually occur towards the center of the stage and can result in overexposure. Light fall-off usually occurs towards the front, near the back and on the sides of a stage. This is a factor especially if your subject or speaker is moving during the speech. Pay attention to background lights as well. Overly bright up-lighting, giant led screens, and general clutter can result in overexposure and confusing backgrounds. Look for areas behind and to the side of the stage that make for good backgrounds where you can place your speaker and keep distractions to a minimum.

Corporate Events Scouting. Envisioning The Shoot

Of course, lighting is only part of the equation. Convention hall size, access to the stage or podium, and entry and exit points are critical factors to know ahead of time. I had arranged to meet with the coordinator who hired me at 9:30 am that same morning. She explained that I was to be a member of a press pool and that we would rotate through three different locations during the President’s one-hour speech. She also showed me where the President would be entering and exiting. With this information, I envisioned how the whole event would likely unfold. Envisioning helps me determine the timing of the event, the best locations to be in, and the equipment I will need to make the best shots happen. It also helps me identify and prepare for any potential problems or challenges I might encounter during the shoot.

Speaking with a Coordinator or Production Manager

            Twice now I have mentioned speaking with people in the know. Speaking with and communicating with coordinators and production people is critical to the success of a corporate events assignment. While it may seem obvious, I am always surprised when coordinators express appreciation and tell me stories where photographers have not reached out to them. Expectations and important boundaries can be discussed ahead of time which helps avoid problems during the shoot. Unexpected events, beneficial vantage points, and key moments can also be discussed and shared. This can provide you with invaluable information and access you might not have been aware of otherwise. Don’t limit your communication to just coordinators and managers. Stagehands, security guards, and even other photographers can be a great source of information as you scout and prepare for any event.

From behind a presidential podium, President George Bush addresses a crowd during a corporate event.

Putting It All Together

            Let’s imagine two scenarios. I will try not to exaggerate in favor of scouting over just showing up.  I won’t have too.

After spending approximately an hour scouting the venue in Reno NV, I was able to collect a wealth of information that I otherwise might not have had. Now,  I know the general lighting for the entire hall and I know the specific lighting for the various parts of the stage. I have preset my ISO, color temp and exposure settings to begin the shoot. I made contact with the production manager, coordinator and maybe a security guard giving me points of contact should I need anything or have any questions. I know where the President will be standing during his keynote and I have an idea of the best backgrounds. There are three locations where I can shoot from and I know what lenses I will need to take advantage of each spot. I know where the President will enter and exit the stage preparing me for any candid opportunities that might arise. The coordinator has walked me through the sequence of events and I can now envision how the shoot should play out. This helps me plan for any problems or opportunities I might encounter. I received instructions from the Secret Service and I understand what I can and can’t do, where I can be and not be. Am I still anxious? Well yes, I’m an anxious person, but I’m not panicking and I feel ready.

The other scenario. I arrive the night before the shoot. I can get into the hall that evening, but because the lighting is different, I am not sure how the daylight will affect the stage. The production crew and coordinator are done for the day and are nowhere to be found. I can see the venue and know that it will be a direct flash only.  I can always dial in the exposure for the stage lighting as the President walks up to the stage. I wonder where he will enter and exit from and where I will be standing. I’m probably going to have to move quickly so I won’t be able to carry a lot of equipment. I hope I have the right lenses at the right time. I have never worked with the Secret Service before, I might have to figure it out as I go. Probably when I fire my flash during the President’s speech. Take a look at some of my corporate events work here http://www.johnmorrisevents.com/portfolio/corporate-event/

August 14, 2017
Corporate Event Photography·Photography
0 comments
by John Morris
  • Previous
  • 1
  • 2

Recent Posts

  • Event Photography Case Study: WSOP Part 2
  • Las Vegas Corporate Photography: The World Series of Poker
  • What is Las Vegas Event Photography: A primer for Photographers
  • Event Photographer Las Vegas and Why I Love Being One!
  • Professional Booth Photography during OFC 2018 at the San Diego Convention Center

Archives

  • May 2020
  • April 2020
  • March 2020
  • February 2020
  • March 2018
  • February 2018
  • January 2018
  • December 2017
  • October 2017
  • September 2017
  • August 2017

Portfolio

  • Corporate Event
  • Trade Show
  • Corporate Portraits
  • Editorial
  • Art & Travel

Info

Las Vegas event photographer / San Diego corporate event photographer

Tel: (702) 807-1600

Email: info@johnmorrisevents.com

Las Vegas, NV – San Diego, CA – Nationwide

Quick Contact

Name (*)

Email (*)

Message (*)

© 2018 John Morris Photography. Las Vegas, NV | San Diego, CA